Showing posts with label Google+. Show all posts
Google Feed API turndown announced- Slideshow function removed

Google Feed API turndown announced- Slideshow function removed

admin 03:27 Add Comment

Google recently announced that the Google Feed API would be retired. As a result, the Slideshow gadget will no longer function and they will remove it from your blog by 29 September 2016.


The Google Feed API was one of Google’s original AJAX APIs, first announced in 2007. It had a good run. However, interest and use of the API has waned over time, and it is running on API infrastructure that is now two generations old at Google.
Along with many of our other free APIs, in April 2012, we announced that we would be deprecating it in three years time. As of April 2015, the deprecation period has elapsed. While we have continued to operate the API in the interim, it is now time to announce the turndown.
As a final courtesy to developers, we plan to operate the API until September 29, 2016, when Google Feed API will cease operation. Please ensure that your application is no longer using this API by then.
Google appreciates how important APIs and developer trust are and we do not take decisions like this one lightly. We remain committed to providing great services and being open and communicative about their statuses.
For those developers who find RSS an essential part of their workflow, there are commercial alternatives that may well fit your use case very well.


Google Adsense Tutorial: How to place page-level ads

admin 00:14 Add Comment
Monetise your content with innovative new ad formats. Page-level ads are optimised to only appear when they’ll perform well for you, they provide a good user experience, and they’re easy to set up too.


Place this ad code in the <head> tag (or at the top of the <body>) of the pages where you want to show the ads. It’s the same ad code for every page and site, and you won’t need to change it even if you adjust your page-level ads settings.

For more help with implementing your ad code, see the Code Implementation Guide


Mobile ads that stick to the edge of the user’s screen and are easily dismissable.

  • Shown by AdSense at optimal times to help increase revenue and provide a good user experience
  • Don’t count towards your 3 ads per page limit
  • Only show on high-end mobile devices

Google Makes GMail More Safer

admin 07:56 Add Comment
Read Google Makes GMail More Safer as ggogle announced on Google Blog..  

It’s Safer Internet Day, and when it comes to the security of your email, we don’t mess around. Gmail has always supported encryption in transit using TLS, and will automatically encrypt your incoming and outgoing emails if it can. We support industry-standard authentication to help combat email impersonation. And there are tons of other security measures running behind the scenes to keep your email safe.

Of course, it takes at least two people to send and receive an email, so it’s really important that other services take similar measures to protect your messages---not just Gmail. Unfortunately, not all email services do. And that’s why, starting this week in Gmail on the web, you’ll see two changes that highlight any affected messages:

  1. If you receive a message from, or are about to send a message to, someone whose email service doesn’t support TLS encryption, you’ll see a broken lock icon in the message.
  2. If you receive a message that can’t be authenticated, you’ll see a question mark in place of the sender’s profile photo, corporate logo, or avatar.
Not all affected email will necessarily be dangerous. But we encourage you to be extra careful about replying to, or clicking on links in messages that you’re not sure about. And with these updates, you’ll have the tools to make these kinds of decisions.
How to create a Site Feed for Your Blog for Better Site Traffic

How to create a Site Feed for Your Blog for Better Site Traffic

admin 02:02 Add Comment

Just recently needed to check and update my site feeds and therefore I Would like to share the tutorial on How tocreate a Blogger Feed for your blogs.


  1. Enter your blog's web address in the "Ready to Burn?" form found on FeedBurner's homepage and at the bottom of the pages in the Blog and Podcast sections. If you plan to publish a podcast with your Blogger feed, check the "I am a podcaster" box. Click Next ».


    The Identify Feed Source page should appear.


  2. On "Welcome", make sure the title and FeedBurner address (URL) of your new feed are values you prefer.


    The Create or Sign In To Your FeedBurner Account page should appear.


  3. Also on this page, create a FeedBurner account by picking a username and password and supplying your email address.


    When you've supplied all the required information on this page, click Activate Feed ». A "Congrats" page should appear.


  4. Read all of the information on "Congrats", then click Next » to continue with the setup process.


  5. If you selected "I am a podcaster" on the homepage, configuration options for our SmartCast service will appear. Here you can supply categories and other information for iTunes, append a copyright message, and submit your podcast to Yahoo! Search.


    When you are finished, click Next ». Configuration options for FeedBurner stats services should appear.


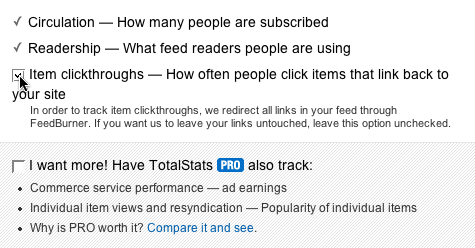
  6. On the stats configuration page, select the level of feed stats detail you want.


    Click Next » to finish the setup process and enter our feed management interface.


    You're now ready to make your FeedBurner feed available on your Blogger site!


Tracking 100% of your feed traffic: Redirecting your Blogger feed to your FeedBurner feed


Blogger can make sure all feed traffic for your blog content goes to your FeedBurner feed. This ensures your FeedBurner stats are comprehensive and accurate; even subscribers to the 'Original Feed' are routed through FeedBurner. To redirect your feed:


  1. In a new browser window, sign in to your Blogger account.


  2. From the Blogger Dashboard, click the Settings link for the blog you want to promote.


    The Settings page for your selected blog should appear.


  3. Click the Site Feed link under the Settings tab.


  4. Type your complete FeedBurner feed address into the Post Feed Redirect URL text field. Make sure you type in your entire feed address including the "http://" portion.


  5. Click Save Settings.


    You should see the message "Settings were Saved Successfully".


  6. Blogger will now redirect all feed traffic for your blog to your FeedBurner feed.


    Note: If you are using the redirection feature within Blogger to send all of your feed traffic to your FeedBurner feed, you may want to modify the code we provide in order to keep your subscribers with you, even if you leave FeedBurner.


Google Docs ready to convert ‘less popular’ file types

admin 22:30 Add Comment


Google's free web-based productivity suite:Google Docs now plays nice with some "less common" file formats.


Google said its productivity suite now supports older formats like TIFF, and non-RGB color profiles.


"Starting today, larger images, images in less common formats (like TIFF), and images with non-RGB color profiles (like CMYK), can also be imported to and exported from the Google Docs editors on the web successfully," the Google Apps team said in a June 22 blog post.


Google Docs lets you create, share, and collaborate on documents online. And it just got better with rebuilt editors for documents, spreadsheets, and drawings, designed to improve collaboration, increase speed, and create richer documents.


It noted converting a file to Google Docs, Sheets, or Slides lets a person edit, collaborate on, and share the file online.


Before this, Google's suite can convert Microsoft Office files as well as JPEG, PNG, EMF, and WMF formats.